Monday, December 28, 2015

Eco-dying Class with Bette

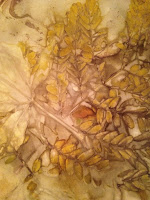
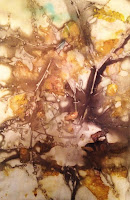
The Fall season introduced me to Eco-dying which is also known as eco-printing.  The process uses natural materials to create images onto papers and fabrics.  While the results are serendipitous, they images and subtle colors created are usually beautiful as well as unexpected.

After sharing the results with a small art circle, the members wanted to know more.  Going back to my source, a good friend who shared her knowledge, Bette, I presented the idea of teaching a beginning class to the group. A date was chosen, materials gathered, and invitations extended.

Organics materials
Steaming fabric bundles

Results on silk organza

Results on Silk Noil


The process produced a variety of results, depending upon the materials and the dye bath methods  used.

Silk into Iron Dye Bath #1
Silk into Iron Dye Bath #2
Paper into Iron Dye Bath #1


Sunday, December 27, 2015

Hand Made Holiday Cards for 2015

Well the season of holidays and good cheer has come.  I try to stay true to the roots of craft and make some of our holiday cards by hand.  While the process is timely, the results are rewarding.  I usually try a technique that is new to me so the outcome is two fold; artful holiday cards are created while I explore techniques and improve my skills.  Oh, happy days!  Plus, I am able to share the joy of the results with family and friends.

Here is one sample of this year's card.  The card is hand stitched on paper which has been eco-dyed.  The process of eco-dying uses only natural materials and creates organic images on either paper or fabric.  Once dyed and dried, I stitch to emphasis the resulting images.


The next set of cards were created using commercial fabric, wine bottle tins of various colors, felt backing, and machine stitching.  The process is fairly easy.  The tin from the wine bottles can be cut or torn to the desired size.  Once torn, I arrange the tin to recreate the image of a tree and then secure each piece with a dot of glue, just to hold in place until the design can be stitched.  Lastly, the shape of the tree is outlined using 12 weight threads.  I sometimes use metallic thread.  Deciding what thread to use just depends upon the look you want to achieve.

Sewing tin to fabric
Finished Holiday Card

Wishing you a joyous Holiday Season ... and may the spirit of the holidays greet you everyday of the New Year!

Monday, December 21, 2015

Honoring the Quilters of Gee's Bend

Several summers ago while visiting Sisters, Oregon during quilt week, I had the honor of spending an hour in a mini workshop with some of the current Gee's Bend quilters.  Their styles of quilting and their ways of being were quite liberating.  Below is a poem that seems to speak to the uniqueness of these artists.

The Quilters of Gee's Bend

 
Seems like that old river tied
itself in a knot just to keep
black folks there at Gee's
Bend while time and fortune
swept on by.

And Master Pettway gave
those folks his name, but stripped
everything else he could. Left
just scraps, but they were used to that.

So those hands that hardly
needed something else to do
unraveled their worn-out
world. Pieced together
remnants of Africa
and raggedy dreams
to make something new.

Let dress tails dance
with britches—heat from
the cotton fields pressed
deep in their seams.
So tired of plowed furrows,
they let their stitches bend
now and then just like
that river. Nothing perfect,
yet God was in the details.
And the quilters called that
making do and visiting
and keeping warm and pulling
up memories each night,
till one day they were told—
we call that art.

Saturday, December 12, 2015

CSN Juried Student Exhibiton ~ 2015

The Community College of Southern Nevada Juried Student Exhibition opened with a reception last night at the Cheyenne Campus. This annual exhibition selected art from more than 150 drawings, prints, ceramics, metals, sculpture, digital images, and design works. The artwork that was submitted is representative of more than 30 different classes from 15 faculty members.

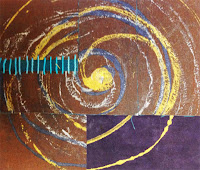
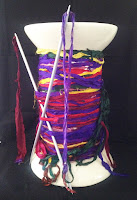
I am honored to have an art piece selected into the exhibition.  The piece, "Needle and Thread" is a sculpture which was made in the Three Dimension class taught by Wayne Littlejohn, Spring 2015.  The larger than life spool was constructed out of styrofoam, auto body compound, and resin. The yellow measuring tape was made out of canvas which was painted then sewn.  I tested several paint types to get a pliable result before creating the final version.  The needle is a wooden dowel shaped using a band sander.  The silver coating applied to the dowel after shaping is a material called soft wax.  The color and shinny texture were perfect for the needle's finish.  Finally, the thread is a standard grey rope purchased at a local hardware store.  I was happy with the final piece as all the components visually worked well together.

Needle And Thread - Mixed Media Sculpture - 2015
 

Friday, November 27, 2015

Ceramic Fall Semester @ CSN

Each semester I take an art class at our local community college to expand my knowledge of other materials, materials other than fiber.  This Fall semester I took Ceramics.  Mastery did not come easy, although time spent in the lab as well as in class lessened the learning curve and frustration.  Working with clay in a desert environment is a blessing and a curse. It drys quickly which makes building easy, but doesn't allow well for days in between.  The wonder found in clay is the material adapts to creating visual texture, extreme or minor.  The technique of glazing adds other dimensions, color, line light and shadows.

Anya was an inspiration for one class assignment. She is our daughter's dog.  As you can see in her photo, Anya has very big ears; that is not an exaggeration !  By varying the concentration of stain in specific areas I was able to increase contrast and add dimension to the flat surface of the clay.  There is more experimentation and skill building that can be explored and acquired in is this area.  I think Anya is a good start in the right direction.  I would like to create photo like images on clay using stain and limited texture on the clay.

Anya ~ Our Daughter's Dog
Anya modeled in clay
Anya stained and glazed


An other assignment was to create something in the world in a larger demension.  Growing up in the high desert of Southern CA and spending hours catching, also releasing, local wild life, I was familiar with native reptiles. From memory and a photo on a iphone, I molded the clay into a horned toad lizard.  Creating his texture using the end of a paint brush was fun, a type of medication. The completed horned toad seems to be a comic version of the real lizard, an animated version instead of realistic rendition.  I like this version very much as it speaks to my more whimsical side of creating art.
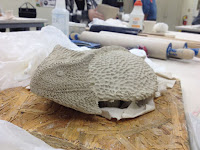
Horned Toad w Texture added

Horned Toad Lizard ~ Final Glaze


My greatest challenge this semester was to move from utilitarian projects toward nonfunctional pieces.  Ideas formed slowly. Finally around mid-semester, I was able to break through with one idea. The one concept soon led to others. The struggle with mastering clay and glazes (at least operationally) was well worth the time and the effort.

Coming from a quilting background, I experimented with the basics of the ceramic tile. I pulled open the form and discovered that I liked the look of a torn tile; it spoke to the constraints and responses of the material under pressure.

What excites me most when making art is learning a medium and pushing it past what we normally expect.  So with the creation of torn ceramic tiles,  I was challenged to artfully combine clay and my medium of choice, textiles. Combining fiber and clay produced some really interesting compositions.  Ideas are still germinating and I will share them in future blogs.  Below you can see the beginnings of the first concept.

Mixed Media ~ Textile & Ceramic
Textile dyed, painted, fused, stitched
Ceramic Tiles un-fired


Thursday, September 24, 2015

Eco-Dying, Something Old, Something New

A new found technique, eco dyeing, is based in established processes of yesteryear .  Eco dyeing got it's name because it is safe for the environment as no chemicals are used in any stages of the dyeing process.  An introduction tutorial to the process is available at  Chicago Craft Mofia. The tutorial provides the basic concepts to using eco friendly natural dyes.

Two friends and I enjoyed a day of eco dyeing water color papers and fibers together.  Betty shared the process as well as resources with us.  We worked at layering paper and organic materials from the garden.  The wrapped bundles were immersed in boiling water for 90 minutes.  It was like Christmas morning unwrapping each bundle and discovering the natural, subtle and striking colors created.

An artist can not live in isolation.  I have found that friends and exposure to all art is conducive to creative growth.  I love exploring materials and experimenting with techniques and creating design in the process. Here are some samples of work created from the day with friends.

Materials
Layered materials
Dyed Paper


Rinsing bundles of paper
Sample #1
Sample #2


 The finished pieces came out very different from what was originally placed on the paper and fabric. While the results are serendipitous, they are equally beautifully organic.

Wanting to enhance the naturally occurring shapes of the leaves and flowers, I added stitch.  Machine stitching looked mechanical. So that option was off the table. Hand stitching was a better choice as the texture created by the hand markings added to the organic shapes and color ways of the dyed papers. 

Torn Paper
Raven
Tree Scape #1
  These hand stitched pieces are 5.5 by 8.5 inches and easy to work with.  My goal is to experiment with different embroidery threads and colors to create contrast and develop the design.  Some designs are pictorial while others are abstract.  Each is stitched utilizing the original print design. Felt was tacked onto back of the dyed paper to provide a foundation for the stitching.  I used black felt, 20% wool. 

A closing thought:
"Part of the act of creating is discovering your own kind. They are everywhere. But don't look for them in the wrong places."
- Henry Miller


Peninsula Quilt Guild, Washinton

What I love about the society of quilters is they love to share.  The Peninsula Quilt Guild in Southern Washington state is a wonderful group of very talented quilters.  I had the honor of speaking at their guild this September.  The progression of coming to art quilting was shared in a truck show of successive works over a five year period. 

Thanks again to the wonderful ladies of the Peninsula Quilt Guild, I had a great time!  Thank you for sharing your afternoon, your work, and your inspirations with me. 

Pre-viewing at Peninsula Guild
Photo of nearby Willapa Bay

Thursday, September 3, 2015

Art Quilts XX: Journeys & Life Cycles

It takes a village to create an artist ... it really takes friends and family.  I am blessed.

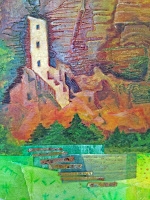
Acceptance into the Art Quilts XX: Journeys & Life Cycles, a juried show at the Chandler Center for the Arts in Arizona is an honor.  The selection into Chandler's juried exhibit speaks to contemporary work in textiles. I submitted two pieces to be considered, Oysterville, Then and Now and Mesa Verde.  Oysterville, Then and Now was selected into the exhibit. I am thrilled to be included in a show where textile work is an acknowledged art. The exhibit will be open to the public from November 13, 2015 to January 9, 2016.

"The exhibition is produced by the Chandler Center for the Arts and is presented by the Chandler Cultural Foundation and the Chandler Arts Commission. The Chandler Center for the Arts Quilts exhibition has grown from a local and regional quilt show to a respected vehicle for contemporary works. The exhibition draws entries from around the United States and Canada and allows thousands of visitors each year to experience quilting as an art form." Chandler Center for the Arts 

Oysterville, Then and Now

Oysterville - detail

Sunday, August 23, 2015

Summer Travels

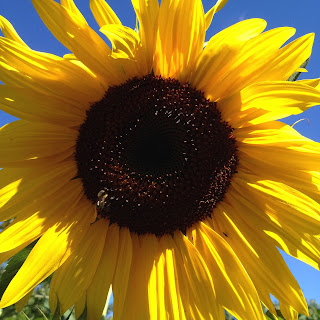
Sonoma Sunflower
After completion of the jewelry class taken at the community college, I traveled to northern California to visit friends in Napa and Sonoma counties.  I was also able to spend a few days in the Sierra Nevada Mountains. Photographing a place slows me down and I see more including the details ... the time then becomes magical and the connection greater.

Garage Detail
Barn


A local Barn as seen from the road side.


Beads in Napa

Natural Heart
Glass beads sold at a local store in Napa and a natural detail found on a hike in the Redwoods.

Saturday, August 1, 2015

Symbolic Metal - Honoring the Spirit

Jewelry, metal working has inspired me to think of metal as an other dimensional element which can be incorporated into fiber art work.  The main goal this summer was to learn how to work with different metals. I was able to acquire basic metal working skills through a summer class at our local community college.

The final piece, Honoring the Spirit, combined many of the skills I acquired through the six week class. Construction of the piece incorporated sawing, soldering, inlaying a stone, setting rivets and risers, and using a ball pin hammer and an embellishing tool to add texture.  Materials used were a fossilized stone, copper, brass, brass wire, silver tubing, and silver bezel. The piece combines two different cultural icons, the Celtic Cross and the Hawaiian sea turtle, Honu and measures 5 by 7 inches. 

The Celtic cross is often depicted with a joined cross and circle. The four arms of the cross are interpreted as the four elements (earth, air, fire, water), the four directions of the compass (north, south, east, west) or the four parts of man (mind, soul, heart, body).  "In various cultures and traditions among ancient races, circles were used to represent the moon and a cross and circle conjoined symbolism the sun. So, it's likely that the Celtic cross was originally a Pagan sun or moon representation." (Celtic cross meaning) 

The Hawaiian sea turtle, is the Hawaiian symbol of longevity, peace, good luck, humility, long life and the spirit within." According to Hawaiian mythology, the Turtle (Honu) Goddess, Kauila was empowered with the ability to turn herself from a turtle into human form and would play with the children along the shoreline and keep watch over them." (Honu mythology

Celtic Honu - 5 by 7 inches

Detail showing three declensions

Saturday, July 11, 2015

Summer Time Art

This summer the local community college offered a Jewelry class.  I took the six week condensed class to learn about working with metal.  Techniques in cutting, filing, drilling, riveting, stone setting, metal painting, polishing and soldering were taught by a gem of a teacher. 

I was also able to make custom embellishments for a current fiber piece.  Combining different elements into fiber is always rewarding; especially when you have total control of the designs desired.

Horse made of brass
Fire Painted Horse attached to fiber


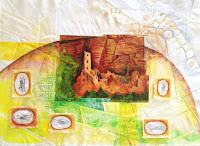
The fiber piece, "Dead Horse Canyon - Mesa Verde",  uses layered background piecing, hand and machine stitching, photo transfer, and Dewitt Inktense water color pencils.  Here is a sneak peak of the almost finished project.
Painted with Skeleton Motifs 
Layered Background


The custom made metal pieces added an other dimension. Below you'll see examples of the pieces constructed in class.  Brass and copper were the predominate metals used to fabricate the images. I totally enjoyed working with metal and plan to do more in the future.

Copper Stairway to Ruins
Brass Circle represents Kiva

Copper Circles, Heat Painted

Brass Horse, Polished then Heat Painted

Brass Circles attached with thread

A Spool of Thread by Any Other Name

Detail
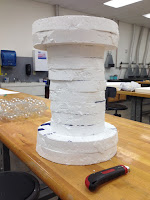
Completing the Spring semester 3-D class I created a Spool of Thread model out of Styrofoam, dry wall composition, and resin. The needles were made from wooden dowels and painted silver.
The piece stands 19 inches tall with an extended circumference of 15 inches.  
Model Cut-Out
 
Completed Spool


I  also played with using discarded material found around the lab.  Resin is my new love !!!

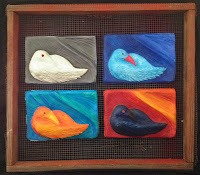
Lastly, I composed a mixed media piece incorporating four of the molded birds made previously and an old screened box found in the yard.  Just fun.
Bird Cage